Showing posts with label recipes. Show all posts

12 November 2010

South Indian Fish Curry - My Mom's Recipe

South Indian Fish Curry...Mmm!
You might remember, a while ago, I declared shamelessly that I cannot cook Indian food. This post is not where I tell you that I can finally cook! Nope. I just want to reiterate the fact that Indian food, with all its coconut and weird garnishing and all those powders in varying shades of brown and yellow, with all those herbs....IT'S JUST DRIVING ME CRAAAAAAAZZZZYYYYY! Sorry, that rant might have erupted from the fact that I burnt perfectly good carrot-beans poriyal today morning... sigh.
Anyway, as a responsible South Indian wife, living in Kanyakumari district, it is my bounden duty to learn to make fish curry...yes, we live in the 18th century here. Why do you ask?! So, I learnt it, by god, I learnt it. I decided I was going to learn to make it, if it killed me...(sometimes, it very nearly did!) My 'women's lib' flag holder friends are going to hate me for this. But the fact is, that everyone here makes wonderful fish curry, and I hated the fact that I couldn't make any to satisfy my fish cravings! I already tried one recipe, but then it was like a tornado - never know when it takes off, and where it will hit, but damage always ensues! Don't get me wrong. There is nothing wrong with the recipe, it's the way I make it that is so off the point! So, if you want to make that fish curry, go right ahead. As for me, this recipe which my mom shared with me, is what has finally satisfied that fish curry craving I have been carrying around for centuries!

My Mom's Spicy Fish Curry
Things you need:

- 1/2 kg fish (you can use any kind, but the fun kind of fish is one that doesn't have too many bones to pick! Go ahead and use your favorite)
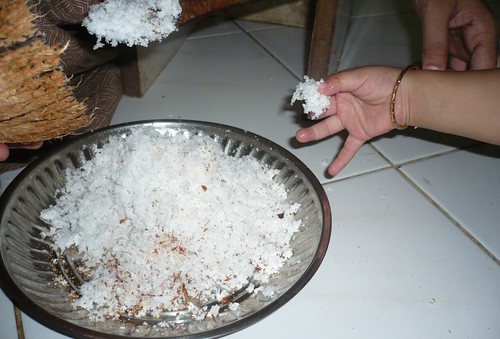
- 1 cup fresh coconut scraped (or whatever they call it, when you use that thing to get this - now that's amazing technology, and the main reason for the ultra-small hip sizes our mothers used to have!)
- 1/2 onion - 1 half of the half (stay with me) should be chopped, and the other half should be used whole.
- 3 cloves of garlic (or 4 if they are small in size)
- 1/2 tsp of cumin seeds
- 2-3 whole black pepper seeds
- half of a medium-sized tomato (make sure it's ripe and red)
- 1 tsp turmeric powder
- 1 tbsp fine red-chilli powder

- 1-2 tbsp pure coconut oil
- 1-2 tbsp cooking oil (sunflower oil, or something which does not have a strong flavor)
- 1 tsp mustard seeds   (just tiny black things that pop like crazy!)
- 1 tsp fenugreek seeds. They are tiny, but they pack a flavor-punch!
- 1 inch of very dark tamarind dissolved in 100ml of water. Remember, the darker the tamarind, the more sour it is. If what you have is a lighter shade, go ahead and use more than 1 inch of it.
- 1 inch of fresh ginger, finely chopped
- 1-2 green chillies (optional- hold on, I'll tell you why)
- 1 sprig of curry leaves
- 1 sprig of fresh cumin leaves (I think some people call it 'parsley')
- salt to taste


Here's what you do:
 
1. First take all ingredients, beginning from the scraped coconut till the red-chilli powder on the list above. Drop everything except the onion, into your grinder/mixer/blender. 

2. Cut the onion in half. You need only the quarter of an onion for the paste. Drop this into the mixer, along with everything else.
3. Grind the ingredients to a fine paste in a blender/mixer, adding a small quantity of water to enable smooth grinding. Keep the paste aside.

2. In a wok, or a clay pot (the mud pot is best), heat the cooking oil. Note: You can use coconut oil here, but I am terribly turned off by the smell of heating coconut oil! It fills the house, and the smell is overpowering. So, I just go with some harmless vegetable oil.

3. When the oil has heated, drop in the mustard seeds and the fenugreek seeds. Wait till the mustard pops. 

4. Immediately, drop in the chopped quarter of an onion, and saute. 

5. When the onion changes color, or becomes whiter, drop in the paste that you made earlier. Please do not let the onion saute to a brown color. The flavor of well-sauteed onion will only go well with other meat preparations (like chicken curry). We need everyone in this recipe to stay fresh and dainty!

6. Now, give the paste a good stir in the pot. Add a couple of teaspoons of water and cover the pot. Keep the flame in simmer, and let the whole mixture come to a slow boil. This could take you anything from 3 to 5 minutes. DO NOT let the mixture boil away to glory! You will be disappointed...Remember, it's all about keeping things fresh and lively

7. When the mixture has boiled once, add the fish and salt to taste (I would suggest that you add a tiny bit more than you usually do, since it will complement the spice and sourness well).

8. Cover the pot again, and let it cook on high flame. After 8 to 10 minutes, carefully lift the lid and take a peek. I say 'carefully', because for some strange reason this curry tends to sputter like a volcano! Why? Beats me! So, unless you want to walk around smelling like fish curry, and making everyone salivate, including the neighbor's cat, be careful when you lift the lid!)

9. Lift a piece of fish out of the curry, and see if it has taken on the color of the gravy. If it is still whitish or pale, cover the gravy and let it boil some more. If the fish has turned yellow, and looks cooked, go ahead to the next step.

10. Next step - Strain the tamarind paste, removing all the seeds and the other stuff that doesn't dissolve. Pour this into the curry and give it a slow stir. 

11. You can also add the chopped ginger at this point. No sauteing needed. Don't worry, the fresh ginger taste does something awesome for this recipe! Now let the curry boil for a minute, with the pot uncovered. 

12. If the gravy is too thick, you can add a little water to ease things up a bit. If you want a thick gravy, it's fine. Just make sure it doesn't burn.

13. Taste the curry (very important step! Really!) to see if the balance of the salt, sourness, and the spice is right. You can add the sliced green chillies that you put on hold, if you feel that the heat is not enough. The spice, salt, and sourness  should not overpower each other. When you taste it, it should feel delicious! If it does, you've hit the spot! When it comes to fish curry, it's all about the balance.

13. Now, pour in the coconut oil, as the curry is boiling.

14. Finally, chop up the curry leaves and the cumin leaves and drop them right on top of the oil on the curry.

15. Cover the pot and turn off the stove. You're Done!

16. After a couple of minutes, when all the boiling is done (yes it will continue to boil for a while, even after the stove is switched off) you can taste and enjoy!

This recipe received great reviews from everyone who had this. It's a little bit of hard work but the effort is totally worth it.

That's the story of how I finally learnt Lesson 1 of 'Being a Good South Indian Wife'.

I discontinued the course, so that's all the subject knowledge I have, and I'm fine with that!! :P

08 November 2010

Savoury Pancake Made with Potatoes + Sides of Sauted Veggies and Tuna Masala

Pancakes have become a mainstay at our household lately. After I made pancakes the first time, the main consumers of my cooking have decided that they will allow me to continue this trend. Now the problem is that I can try out different recipes only at dinner time, because that is the only time of day when I can take time to be creative/daring/foolish (or even manage to get all the grocery I need for a particular recipe!). So, I end up wanting to make pancakes for dinner a lot. This went down well with the husband and child the first time. Second time around, they had a doubtful look on their face, and then smiled their way through their pancakes anyway. Third time came by, and when we had pancakes for dinner again, my husband might have tried to run out the door! Humph! 

Anyway, I decided we can't have that going on any longer, and ventured into (notice how I make it sound like a great journey or business undertaking...) savoury pancakes. And I am really glad I did. Since we can't just have a savoury pancake without something to complement it, I also made two side dishes to go with it. 

Whoa! Wait...What?!?!? Did you just say, "TWO side dishes" lazy procrastinating Jane?!?! Yes, I did. Because, I started out with one plan, and then I ended up making something else. Happens to me frequently. So, I had cut up veggies for one dish, and opened a can of tuna for topping the pancake or something like that. Finally I ended up making two separate sides to go with the pancakes, all because I forgot my original plan!! Anyway, no complains from anyone. Debbie ate up the whole thing, and told me she loves me! So, I think we have a winner. Recipe? Here you go...

Savoury pancakes with Tuna Masala and Veggies Stir-fry
Savoury Pancakes with Potatoes
Things you need: (this is the basic pancake mix, minus the stuff that makes it sweet, like vanilla essence and sugar. Instead we use other yummy savoury stuff. Simple!)
- 1 egg
- 1 cup maida (flour)
- 1 1/2 cup milk
- 1 tsp baking powder
- 2-3 medium-sized potatoes
- salt to taste
- pepper to taste
- some cumin leaves (a.k.a parsley)
- some diced bacon or chicken frankfurters (optional)
- 1 tbsp oil

Here's what you do:
1. Peel the potatoes and boil them with a pinch of salt, until they are very soft.
2. When they are well boiled, mash them and set aside to cool.
3. Next, start on the pancake batter.
4. Beat the egg well, in a deep bowl.
5. Now add the maida, baking powder, salt and pepper into this and mix well.
6. Gradually add all the milk and mix well.
7. Now, slowly incorporate the mashed potatoes into the mix.Mix it well and try to dissolve as much of the lumpiness as possible. If there are stray bits of potatoes that just refuse to dissolve, let them be. They'll only add to your happiness!
8. If you feel that the batter does not have a pourable consistency, add some more milk.
9. Finally add the diced meat. I did not add meat, because for some strange reason I bought a can of tuna! Don't look at me like that...I think I zoned out for a moment at the grocery store. Also, I think they didn't have any other type of processed meat. But if you want to, adding some meat in this pancake batter is just the thing you need to do to make this world a better place! :)
10.Finally, add in the finely chopped cumin leaves for that 'Howzat!' effect.
11. In a flat pan, heat some oil, preferably something that does not have a strong flavor. Oh, you can also use butter.
12. Now, pour a large ladle-full of batter on the pan, and let it cook on one side. DO NOT try to spread the batter! When you see the bubbles burst, turn it over ever so lovingly.
Now, savoury pancake is ready to go. This is great all by itself, but if you have an unused can of tuna, and some coarsely chopped veggies which you forgot why you chopped, then go ahead and make these:


Tuna Masala
What you need:
- 1 small can of tuna
- 1 onion finely chopped
- 1 tomato finely chopped
- 2 large green chillies finely chopped
- 1 tbsp ginger-garlic paste
- 1 tsp mustard seeds (optional. Go ahead if your method of cooking is deeply Indian, and you just need to see those little guys in every dish you make. Or if you need the time to chop the onions!)
- curry leaves (again, optional. Only to be used, if you are using mustard seeds. Otherwise, why bother? I don't think this influences the taste of the dish. Only maybe if you like the gourmet look of green leaves sticking out of your food!)
- salt to taste

Here's what you do:
1. First, heat some cooking oil in a pan.
2. To this, add the mustard seeds and wait till it pops.
3. Now add some curry leaves, and then the onions.
4. Saute the onions well, until they turn slightly brown.
5. Now add the chopped tomatoes and saute well. Let it mix well together until the onions and tomatoes merge together.
6. Add the green chillies and the ginger-garlic paste. Let the whole thing simmer for a while.
7. You can add a little bit of water, if you find the entire thing too thick.
8. Drain any preservative oil or liquid in the tuna can, and add only the tuna meat into the pan.
9. Quickly add the salt and give it a good stir.
10. Let the mixture simmer for a while. Make sure that the dish is not too watery. It should be a thick paste-like consistency. Now, take it off the stove.
11. Garnish with some cumin leaves.

Stir-fry Veggies
I wanted some color, crunchiness, and healthy food in my dinner that day, so I also stir-fried some vegetables. The secret behind a good stir-fry is to make sure that the vegetables retain some of their fresh crunchiness and their original flavor. So, hold back on those wide range of spices and sauces, except for the bare essentials,  and let the veggies do the talking!

Things you need:
- 1/2 cup carrots coarsely cut into 1cm long pieces (I don't know the technical term for this. Just don't go and finely chop them, okay?)
- 1/2 cop onions coarsely chopped
- 1/2 cup green peppers (capsicum) coarsely chopped
- 1/2 cup ripe tomatoes coarsely chopped
- 1/2 cup beans cut into 2cm pieces. You know...they should all be the same size...figure it out yourself!
- 1/4 cup green peas (I didn't have any, so none in the picture)
- 1 tsp of soy sauce
- a sprinkling of oregano
- salt to taste
- pepper to taste

What you do:
1. First know that vegetable stir-fry is really really simple!Okay, now that we've established that, let's move on.
2. Heat some cooking oil in a pan. You can use olive oil if you are going the healthy way.
3. Now, drop in the onions and green peppers together. They both require about the same cooking time, and also give out some water, so let them meet first!
4. Now drop in the carrots, beans and peas. Sprinkle salt and stir very quickly on a high flame. Make sure they are partially cooked.
5. Add some oil every time you feel that the veggies are about to stick to the pan. You just want the vegetables to be a little on the fried side of things :) I like the sound of that - 'fried side'. "I'll meet you on the fried side!" hehe!
6. Now, pour in the soy sauce, sprinkle some oregano, and give it another stir.
7. Finally, add the pepper and give it a stir. Okay, if you see the word 'stir' a lot here, that's because it's the basic concept of a stir-fry....That's all there is to it! You just heat some oil, and just dump in veggies you like, and stir. Simple!
8. There is no 8th step. Just serve and eat. Or don't serve. Just eat! Heheh!

I arranged both the stir-fry and the tune on top of a pancake to make it look all 5-star-restaurant-ish, but I doubt if it looks like that at all! Anyway, it certainly tasted like a 5-star! Who cares about the way the food looks, as long as the picture is your's right? Yep, I took the picture this time. So...
This was truly delicious. Of course, you shouldn't just stop with one pancake...

26 October 2010

Discovering the Elementary, my dear Watson! - Bread Pizza!

Mind you, I said, 'Bread Pizza' and not 'Pizza Bread'. If I had said the latter, that would mean that I have the superior skill-set it takes to make pizza dough from scratch, that I would know what is yeast (including its properties, and why the heck exactly we need it in this recipe - I have no idea why), and that I have the upper arm strength to actually make pizza dough!

You know me too well, so I won't elaborate on that!

Instead, what I did was, used my normal bread slices that I always have lying around at home, and turned it into something that would satisfy my perennial pizza craving. Yes, I do have a perennial craving for pizza. I think I was born with that technical fault! Something about the cheese and the sauce and all those carbs...

Anyway, if you suddenly have a craving for pizza, and want to fix a quick and painless dinner, make Bread Pizza.

Bread Pizza

Things you need:

- 1 tbsp oil - either olive oil or normal sunflower oil.
Psst, you could also use butter...or pretend I said nothing...

- bread slices (obvsly!)

- onions diced into not-so-large pieces

- green peppers (capsicum) diced

- red peppers (capsicum that's red)diced

- yellow peppers (capsicum that's ... you get the idea.)

(you don't need all of them, just one kind will also do just fine)

- 1 tsp black pepper (ha! No. This time it's the black powder!)

- 1 tbsp ginger-garlic paste

- Pizza Sauce 1 tbsp per slice (I think FunFoods has a product that some Ngl grocery stores carry - Lynns to the rescue!)

- Mozarella cheese grated

- chopped canned-meat of your choice - chicken frankfurters, luncheon meat, or even cooked and shredded chicken - whatever you want your topping to be. As long as it's not sweet - I don't dig sweet pizza! Sorry, there are some things my palate won't accept...

- oregano flakes

- soy sauce

- 1 tsp red-chilli powder, or 2-3 finely chopped green chillies

Here's what you do:

Just make the topping and arrange on the bread, then microwave! Ba-ding! You're done!

Okay. So making the topping takes a little longer...:P Sorry!

I just threw stuff together on the pan, and improvised as I went along. So, anything that caters to your taste/craving should do.

1. In a pan, pour in a tbsp of oil or melt some butter. When the oil heats up, drop in the diced peppers.

2. When the peppers are well sauteed, add the onion and a tbsp of ginger-garlic paste.

3. Sprinkle some salt and pepper on this, and saute well.

4. Now pour in the soy sauce. Then add the green chillies or red chilli powder if you need more heat. Note: if you have a palate that doesn't take much heat, STOP with just adding black pepper powder.

5. Throw in the meat, and let it cook with all the veggies for a while. If you want to go vegetarian on this one, or if you didn't have any meat on hand when your craving struck (you know who), skip this step.

6. Let the whole mixture simmer for a while, till all the water content in the veggies have released and reduced. Now you have yummy pizza-topping! Yaay!!

Note: You know, you could also arrange all the toppings raw on the slice, but what's the fun in that?

7. Next, grease a baking pan or microwave dish that's flat and arrange bread slices on it.

8. Spread some pizza sauce on the bread slice. Go easy on the sauce, because it has a distinct tangy flavor that you might not like too much of. I got so excited that I slathered on the sauce for a couple of slices, and regretted it with every bite. One spoon sauce per slice will do.

9. Place some of the pizza-topping on the bread. Arrange greens olives or just leave it like it is.

10. Finally, for the glorious part of the entire thing - grate some Mozarella cheese onto each slice. You can over-do it or under-do it, but I'd think you were weird, if you didn't want too much cheese on your pizza! Hence, my culinary contempt for a certain cheese-hater's preferences...

11. Now, just stick it into the oven or the microwave for 3 minutes or till the cheese melts. Let it sit for a while after you remove it from the oven.

12. Eat. And thank me for this pizza short-cut. Or not. Don't have to thank me if your mouth is too full with wonderful pizza! I'll understand :)

Just want you to know that I failed, AGAIN, to take a picture of something I made! So, your pizza could look like this...


Or this...

...based on how colorful your pizza-topping is. Mine was pretty amazing - emphasis on 'pretty'. Unfortunately, you know what transpired. I ate, and forgot everything else...sigh. This is getting to be a problem.

Note: These pictures are not mine.

Anyway, enjoy, until I come bug you with another recipe, complete with MY OWN pictures of the food! :D

25 October 2010

Discovering the Elementary, my dear Watson! - Pancakes!

I have had many 'Duh' moments! In fact, 80% of my life is all about the 'duh' moments. You know, like stuff that everybody just KNOWS when they are put into a certain situation, but for which, I need a user's manual, complete with detailed, labeled diagrams! Yeah, sometimes I make myself tired...

Anyway, cooking, by and large, has been that way for me, which you already know if you have closely followed this blog. I can't cook. That should probably be my epitaph, or something. So, I used to think that making pizza, pancake, and brownies were like high-end magic, or at least stuff that I would never be able to do, without changing life as it was for myself!! HAHA! I have no idea what I just said! Oh yeah, what I said was that I thought pancakes and brownies were hard to make.

But then, (I love how you can break all rules of grammar on your personal blog!) I decided last week, that I am going to figure out the pancake and the pizza. One was, and the other wasn't really...

So, here's how I made pancake - those who make scrumptious pancakes on a daily basis and WOW your family every day, and are adventurous with their pancakes to turn them into 5-star restaurant cuisines, please...PLEASE ignore this post. Others, like me, who have no idea how a pancake is made, have never eaten one, or think that it is 'Un-do-able' follow me. It's really elementary, my dear Watson!

Basic Pancake Recipe


This is what you need:

- 1 egg

1 & 1/2 cup milk

1 cup flour (maida)

3 tbsp sugar

pinch of salt

1 tsp vanilla essence

1 tbsp baking powder

Here's what you do:

1. Whisk together the egg, vanilla essence, sugar and salt. Whisk till the sugar is, at least partially, dissolved.

2. Now, add the flour and the baking powder, and combine well.

3. Pour in the milk and stir well, so that no lumps are formed. Remember, lumps are no good for any one, anywhere.

At this point, let me just say, that if you have ever made wheat dhosas for dinner on those totally uninspired evenings, you know that making a pancake is not very different. It's the ingredients that are the fun part!

4. Anyway, make sure that your batter is not too watery (or milky!), and not too thick either. You know... your 1&1/2 cup of milk should be enough to make an easy-to-pour batter.

5. Heat up a flat pan (non-stick pan or your dhosa pan should do), and, if you don't care about your diet, go ahead and dab some butter on the heated pan. If you do care about your diet, skip the butter. Nothing inedible will happen!

6. Take a large ladle-full of batter, and simply pour in the center of the pan. NOTE: Please, please DO NOT spread it around with your ladle!! If you, like me, have made one too many godhumai dhosas (wheat dhosas) and rice dhosas in your life, you will have the tendency to spread batter around on the pan. DON'T DO IT! Hold your hand back, and grit your teeth if necessary.

You see, pancake is wonderful like that. No effort at all, no stress to make perfect round-shaped things. Just pour and let it be.

7. You will see that the batter itself has the tendency to spread a wee-bit. After that it will stop spreading and start to fluff up nicely. YUM!

8. Wait till all the bubbles on the batter burst (now it's back to the dhosa process again!). Flip it over on the pan, if you have crazy Julia-Child-skills! If not, just take a flat ladle and turn it over.

9. Let it brown up a bit on the other side too. You shouldn't let any dark-spot, burn-marks, or scars form on the pancake. Treat it like a gentle flower...

10. Flip it back up onto a plate...and go make some more. Or...leave some one else to make their own breakfast (I only wish...) and pour some honey over your pancakes and stuff your pretty/handsome face with them!!! Usually, people use maple syrup. I have no idea what it is. So, I used honey, and I was anything but regretful...meaning, that I could not wipe the smile off my face...

Pancake, where were you all my life? Sigh!
PS: If you are wondering what's all this 'pancake & image not mine!' about, I just wanted to let you now, that I did NOT photograph even one part of the pancake-making process. Even though I seriously considered it for all of 2 seconds, I did not even stop to photograph the finished product. It was all already in my mouth! I made it twice last week, and still failed to get a picture. So, I used an image I found on the web. Just googled 'basic pancake' and got these images. These images are not mine. But, for the record, I would like to sincerely state that I did make pancakes and they did taste heavenly. And mine looked exactly like those in the pictures. So, There!

19 September 2010

Learning from Karen: Apple Upside Down Cake

I baked again! And this time, I adapted a recipe from Karen's Contemplations and Ruminations. I tried the Apple Upside Down Cake! And it was gooood! (Please say that like Bruce Almighty!)

I made it for my in-laws when we visited them this weekend, and I am glad to say they liked it! It was the kids and the husband who liked it the most, I think. My man is a lover of all baked stuff, so I couldn't go very wrong with this one! Also, Karen's instructions and pictures are really helpful, so it was a breeze! Here is Karen's recipe.

And now...

Ingredients:

2 - 3 medium apples (or 2 large ones)

1 & 1/2 cup maida (flour)

2 heaped tsps baking powder

1 & 1/4 cup sugar

about 80 grams butter

1/2 cup milk

1 tsp vanilla essence

1 egg

Equipment:

Baking dish

Baking oven (or microwave)

Method:

1. Peel the apples and slice them into wedges.

"I like this dish with its pretty African shapes and colors"

2. It will be very convenient if you have a helper to get rid of all the skins and seeds of the apples! My diligent helper did a pretty good job, I must say!

She emptied the skins onto the table and put them in the dish again to pose for this picture!!
Public announcement: At this point I felt like I will not be able to do any proper dinner-cooking, so I resorted to serving this and left over sambar from lunch, for dinner:


a South Indian favorite and the savior of all working women throughout the country!

3. Next, melt 2 tablespoons of butter in a pan, over a low flame, and add 1/2 cup of sugar to it. Stir constantly till the sugar melts.


I may have added a tad bit more butter than necessary...I'm not saying."

4. The sugar will melt to form a golden gooey liquid. This should probably be made into currency or something!! It's that golden and precious!

The good stuff


5. Please ignore the not-so-ideal-looking pan, and go to the next step before the sugar hardens into toffee. 'Coz harden it will! I let it harden a bit too, just like Karen did! But don't worry, you can totally dilute it again, but why bother if you can do it right the first time?

6. Now add the apples in and stir to coat them with the caramel syrup. Cook till the juice of the apples completely leaves them and mixes with the caramel and the entire thing becomes sticky, gooey, golden, sweet and brown, and you can't resist sneaking a spoonful into your mouth!


7. Butter a baking dish and spread some flour over it. Now spread the apple caramel mixture at the base of the dish, making sure that the entire bottom of the pan is covered.

8. Let's make the batter now. In a bowl, add all the remaining melted butter (I like the sound of that!), and the sugar and mix well.

I have no more pictures the next couple of steps. Seriously, do you think I was so skillful to photograph the ENTIRE process?!?! I'm glad I got this far without burning anything!!

9. To the mixture of sugar and butter, add the egg and beat well. You can also add the vanilla essence into the mixture.

10. Now add the flour and mix vigorously because you really want everything to blend together smoothly. You can add the milk gradually to loosen things up and form a smooth batter that is pourable. If you are greedy and disobedient like me, you can add some chopped nuts - I added cashews!

11. Pour the batter above the caramelized apple, and sit back and contemplate on how awesome this is going to turn out. Also, you can smell the divine perfume of vanilla and caramelized apples.


12. Stick it into the oven for about 30 - 40 minutes or you microwave it on high for 10 minutes. Open the oven and take a peek to make sure everything is going okay....if you are paranoid like me!

13. When it's done, it should be brown, and slightly cracked in the middle - if you used the baking oven....head to Karen's recipe to look at the picture. If you used the microwave, chances are you're not really getting the brown look, rather it will look like this:


This looks alarmingly like the dhosa! But I assure you, it is very yummy apple cake!

I have poked a hole into the cake to make sure it is baked. I don't have toothpicks at home (I have a 3-yr-old instead), so I used the end of my wooden spoon! You may now laugh your heart out at me...sigh.

Oh! Look at the pan from the side! It looks good enough to just scoop put and eat with some icecream!


14. Now comes the 'Upside Down part. Take a large cake dish, or a stainless steel plate, if you don't have those fancy things. I don't have one because, never in my life did I expect I would be baking...So...

15. Place the plate upside down on the plate, and then carefully turn the entire thing upside down again.

16. Let the cake loosen itself from the pan and settle on the plate. Now you have the lovely apple top-side, and all is well with the world!


Oops! Sorry. I did it again!


Now, you can cut a piece, all warm and lovely, and eat it with vanilla icecream!

Learning from Karen: Macaroni and Cheese

Here's a shout out to an interesting blogger who hails from Nagercoil, and has one of the most interesting blogs I have come across. Karen from Contemplations and Ruminations , a very artistic person who loves to read, and frequently updates the best reviews. She also cooks, and is very nimble with arts and craft, volunteers at local charity organizations and does so much more cool stuff! Oh, and she also has a really cool haircut!! In fact, she is a lot like me, except way cooler than I can ever hope to be!!

So, lately, I have been quite adventurous, and have been taking pointers from Karen's food posts. I have tried out a couple of her recipes. The first that I tried iiiiis (drumroooolll)  Macaroni and Cheese!

What? That is your idea of adventure?!?!? Believe me people, when you live in a place where cheddar cheese and unsalted butter is a rarity, simple and straight-forward Mac & Cheese is akin to jumping from the top of the Empire State Building - months of research, scouring the market for the right equipment, and then, taking the plunge! When it's done people appreciate you for the sheer awesomeness of the act, but they still can't believe that you were actually able to do that! Some others will ask, "Okay, but why do you need to do such things? What is the purpose?" To those people, I say, "I do it because I wanted to tell myself I can... HA!!"

So, here's what I used for Karen's Mac & Cheese, but I made a few changes for my convenience:

Ingredients

1 cup of elbow macaroni

2 - 3 tbsps butter

1 heaped tbsp flour (maida)

1 & 1/2 cup milk

3/4 cup cheddar cheese

1/2 cup ham or  salami chopped. I had chicken frankfurters, so that's what I used.

salt, pepper and oregano to taste (this is the stuff that I mentioned scouring the market for - oregano. I found it in Lynns! So, Nagercoilans take heart!)

Equipment:

Baking oven (I only have my loyal microwave, so I just nuked it. Note: it does not give the best results. The baking oven is ideal)

Baking dish (or a glass or microwave friendly dish)

Method:
1. Cook the macaroni aldente (that is, it should be soft but half-done. Like it requires more cooking. Don't be like me and be oggling at the white sauce that you made and let the macaroni over cook!) Make sure you add some salt when you cook it. Drain the macaroni and set aside.

2. Heat the butter in a pan on a low flame, and add the heaped tablespoon of flour to it. Keep stirring so that the entire thing does not form one big lump! You don't want that. Lumps are bad, wherever they are...think about it!

3. While you're reflecting on the dangers of lumps, don't forget to add the milk! Add it slowly, constantly stirring the mixture to make sure that everything blends in smoothly. This along with salt and pepper, as Karen says, is the basic white sauce.

4. Remove the pan from the flame, and add 1/2 cup of cheddar cheese to the sauce. It will melt in the heat of the sauce, and you can give it a stir to make sure it makes friends with the sauce.

5. Now add the pepper, salt, and oregano to the sauce.

6. You can also add the meat - in my case, the frankfurters (about 1/2 cup) - and stir everything in well. Note: the meat part is optional. If you are on a diet (ha! what are you doing making mac & cheese?!?!!), or are resisting meat for a while (poor your!), or just do not want to add to the extra calories and guilt (join the club!) then you can leave out the meat... I know, I jabber a lot...

7. Anyway, now, pour the macaroni into your baking dish.

8. Now comes the good part. Pour the sauce onto the macaroni, and give it a light stir so that all the macaroni is completely coated with the sauce.

9. Spread grated cheddar cheese on the top of the macaroni.

10. Plop it into the oven and let it do its thing for about 10 -20 minutes. I nuked it on high for about 8 minutes.

11. There is no '11th step'. Take the macaroni out and oggle some at the browned crispy top of the dish, and then dig in!! I totally missed out on the crispy browned top because of the microwave. Invest in an oven. I will, one day...sigh!

Mine looked like this:

Ooohhh Mama!

No crispy top, but who cares?!? It was yummy, YUMMY!!! Debbie loved it! Why, even the resident cheese-hater (hint: I married him) deigned to have a plate! WIN!

-------------------------------------------------------------------------------------------


Want yummy life-size images that make you drool? The Pioneer Woman's Macaroni and cheese will give you the fix!

30 August 2010

Microwave Brownies... And my Baking Debut!

 
My mother bakes the best cakes I have ever had. She is one of those rare people on the planet who can taste food and figure out the recipe all on their own. I think 99.9% of those people are master chefs!!! Okay, you guessed right...I am really proud of my mom and her culinary skills. I would also like to point out that my
culinary skills are...well...no where in sight, so far!

The closest I ever got to a baking dish is when I dig in to my mom's Dates Cake! (will get you the recipe soon) However, I decided that, having a chocolate-loving daughter, this state of affairs could not go on for very long! And, I have been craving brownies from the time I knew they existed. The local bakery sells brownies, but I came very close to asphyxiation when I tried them!!! I want to live, people!

And then, there is the fact that I have no oven...yes, I know, I sound like the pathetic soul that I am... But I do have a microwave!! Yaaay! So...

I Googled, found, learnt, revised, and etched into my memory...this recipe:

MICROWAVE BROWNIES

(Caps lock deliberate to indicate awesomeness!) This is my first attempt at baking, EVER. So, cheer me on, okay?

This is a small serving, but you can double it and it works out just fine, as I found out yesterday. I first made these 2 weeks ago, and the pictures are from that attempt.

Things you need: (Basic, non-fancy-schmancy stuff will do for this brownie! And that's good, because, duh, I live in Nagercoil...)

1/2 cup flour (maida)

1/2 cup cocoa powder (Note for folks in Nagercoil :P - I used the Cadbury cocoa powder that is available in a purple tin in local shops)

1 cup sugar (best to use powdered sugar, because the granules take a heck of a long time to dissolve in the butter - not good. If you don't have powdered sugar, just powder the sugar you have, in your grinder/food processor!)

1 & 1/2 stick of butter (I used the Amul salted butter)

2 eggs

2 tsp vanilla essence

Chocolate chips (So not optional, but I could not find this wonderful blessing anywhere in this town, and I had to do without it...*sniff*)

Chopped Nuts - any kind. I used cashews and almonds

Method:

In a bowl, mix the cocoa and flour well so that both have blended in.

Soften butter and mix the sugar in with it, until soft and creamy.

Add the 2 eggs and whisk till soft and blended in well. You can add the vanilla essence too.

Now, add the dry ingredients very gradually into the liquid mixture (one tbsp at a time) and keep stirring till your arms fall out! Or, if you are lucky like me to have a sweet, patient sister, get her to stir while you casually stand by and add the dry ingredients!! :P Better, yet, use a hand-held or table-top mixer.

When the entire batter has been stirred well, pick the bowl up and sniff the awesome aroma of the entire thing. "People" have been known to eat a finger-full of batter right off the bowl...but that's just "people"! You don't have to do that...or you could, if you want to...*hint, hint*

Now, grease a round (or rectangular) glass baking dish* with butter, and sprinkle it with powdered sugar. I did not have powdered sugar, so I just powdered up some butter cookies that I had and lined the baking dish with it, over the butter! And it rocked!!!

*Use only glass dishes that are meant for microwaves. NEVER use metal, unless you plan to blow up your microwave oven!!

Now, just pour the batter into the baking dish. You might have to spread the batter equally to all parts of the baking dish, because sometimes the batter can be on the thicker side.

Now, stick it into your microwave and set it on high, and set the timer for 10 minutes.

I would strongly suggest that you take a peek at the 7th or 8th minute to check on things. Take a toothpick and insert it into the center of the brownie. If it comes out clean, it's done. If there is almost-cakey batter stuck on it, you need it to go on for the remaining time.

There's no hard-and-fast rule here. If after 10 minutes it still looks suspicious, give it another minute of baking.

At the end, let it sit in the oven for a few minutes. Then take it out and cool it completely, because warm brownies refuse to let go of the baking dish. They still want their mommy!

When cooled, eat the whole thing up without sharing...Oh, sorry...bad advice!!

When cooled, cut out a piece, place it on a small plate, top with vanilla ice cream and a cherry (optional)....eat and go to heaven!

Then come back and tell me how it was. Okay?? This part is NOT optional! Come one, I want to know how yours turned out!

This is the chewy, moist variety of brownie that I love! I am so not into the dry-cake kind of stuff...


Not the best picture possible, but it was after 10pm and I was not at my most patient self....

...as is obvious from this picture!


Wasn't me!


Anyway, she loved it... that's what's important.

21 April 2010

Food Blogs, and Why I Hate Them!... a.k.a Okay, I Actually Love Them Too Much!


Okay, I have an obsession (this blog just got dangerously personal...)...staring at food...there I said it! People make food, eat food, sell food, buy food, design food, sculpt food...I just stare at it. At the lovely colors, the lovely food photography, the chocolate cake that I can almost taste off the book or computer screen, the roasted chicken I can almost smell in that scrumptiously lighted photograph...


And the best place to appease the hunger pangs coming out of my eyes? Food blogs!! I don't know why I had to say that with double exclamation points, since food blogs are a dime a dozen these days...! exclamation point! (I seem to use a lot of these nowadays, probably because I can't believe myself half the time?? Question marks?


Okay, help me out people...don't tell me no one else in the entire blogosphere has this obsession??...come on!!! Okay, I hear you back there...thanks for the support.


Anyway, I have, like, tons of them subscribed on my reader, and bookmarked left and right, that it takes me hours, every night, to finish oggling at the food. Some recipes, like a few, ...okay, maybe 1 or 2 in the entire time I've been reading these food blogs... I have tried to make. Others, I simply look at, and wish someone would make them for me...not make by myself, mind you...but that someone would bake me that cake, roast me that chicken, saute that asparagus, get me that doughnut, give me that cookie, brew me that coffee...you get the idea .....  siiiiiiiiiighghghghgh! I am really sad now...


But WHY? Why do you obsess over food blogs? Why do you do it? My answer, (channeling Isla Fisher here), "Because when I obsess over food blogs, the world is a better place". Camera zooming in on dreamy eyes (mine), shocked expression on face (yours), violin playing a slow tune, rising to a crescendo (orchestra...Hey, who invited them?!?!)... surreality follows...


So, maybe I am no expert when it comes to blogging (I totally wrote 'globbing' just now...probably delirium from staring at all that sugar!), but these are some of the best food blogs out there...take a peek, and hope you can never look away...and Hey! if you cook some of the food you see here, be nice and send me a sampler, or a big package...I'm not picky that way!


Bakerella You have got to be from some other galaxy, if you are a foodie and haven't heard about this lovely lady. She stands for all that is sweet and cute...lotsa sweet, but the cuteness...ooohhhh, I feel faint already!!


The Pioneer Woman I wish I was one of her kids, no seriously...Ree, will you adopt me...like, not for always, or anything...but only for meal times...please...Pretty PLLLLeeaaaassssse?!?!?  Could I have your Cinnamon Rolls just once, please? Then I can die peacefully... Reader, go to her website, click on the 'Cooking' link, and stay there!


SmittenKitchen The only food blog whose name is a warning of your fate once you start reading the posts! I am smitten, absolutely smitten! There is always a jaw-dropping picture smack in the middle of the page, and...well, that's usually as far as I get! Her recipes list is so long, you could put on weight just by reading it! And I am smitten...but I already said that... Go get smitten, people! You know you want to...after this picture....


Joy the Baker Can't argue with that! What an appropriate name! What joy at looking at all those good eats, and that fabulous personality! I love the little bees buzzing around on her blog...I mean, who can resist food like that, right?


Two Boos Who Eat A lovely couple who love good food, how simple yet yummy can it get?! And they like to stay healthy...important if you have all this yummy-ness going on!


Love and Olive Oil And while we are on the 'couples' thing, these guys are pretty cool, too! Love and Olive Oil, two very healthy, very 'good for you' things...I can't complain about this visual either!


Multiply Delicious Really huge, mouthwatering pictures of food, and this Heath Bar Chocolate Trifle pretty much did it for me! I'm a a fan for life! Mommy Heather and her family of 4, cute family picture, adorable babies, yummy color-scheme,  - win, win, win!!


Fancy That...Fancy This Ameena Din's awesome humor, her cute little baby girl, her humor, her interesting food choices, equally interesting rants about the furniture, and humor! She has some good recipes too! But best of all, she has visited my blog..Yaaay! I have 1 reader that other people recognize!!!!


And, finally, Dad~Baker & Chef Super Dad who makes the best Chocolate Mousse in the whole world, on short-order? Bakes awesome birthday cakes? Cooks delicious Indian cuisine? Takes on a Daring Baker Challenge? Check, check, check, and check...Guilty on ALL counts of Awesomeness! Sheesh, I envy the kids!


Okay, now that I am sufficiently miserable knowing what I'm missing, I will proceed to share the miserableness with my family through dinner...Actually, I am not that bad a cook, just not 'Food Blog' material...so, I wrote this post to get some of that awesomeness onto my blog!!


Enjoy... But first, tell me, do you know of any good food blogs out there? Or do you have one of your own?...Tell me in your comments; I would love to visit!


-------------------------------------------------------------------------------------------------


I have entered this post in "Things I Love Thursday" over at TheDiaperDiaries. Go on over, and join the party!

20 February 2008

The You-Name-It Recipe

This is a simple, leave it on the stove and forget it, yet yummy recipe! Try it! This recipe is in small quantities as I usually just have to cook for two. However, you can go ahead and try a larger quantity. Just make sure you increase all the ingredients proportionately!


What you need is:

¼ kg chicken cut into manageable pieces


1 large potato, cut into bite-sized pieces


1 tablespoon coriander powder


1 tablespoon red chilli powder (or more, if you want it really spicy)


1 teaspoon turmeric powder


Salt to taste


Half cup water


For the garnish:

1 tablespoon oil


1 large onion cut in really thin slices


Ginger-garlic paste*


Green pepper (capsicum) cut into very thin slices. This is optional but I strongly recommend it!


Coriander leaves


*Make this paste beforehand by grinding equal quantities of ginger and garlic to a fine paste. I like to have a container of it stocked up in my fridge always so that I can use it now and then. It’s great for digestion and does something wonderful for the taste too! You can always get packed ones from the market, but that doesn’t taste as good.


Right! Now that’s done, the method is as simple as ever. Just get a non-stick pan that will hold all the chicken and potatoes. Put in the chicken, potato, water, coriander powder, red chilli powder, turmeric powder and the salt. Put the pan on the stove and close it with a lid. Leave it on simmer for a while. See I told you it was simple. After, maybe ten minutes, take a peep to see how it’s coming along. You may want to stir it a little.


Make sure you have a book to read or something else to do since this does not require you to stand guard throughout!


After some time, after quite a long time really, check to see if the chicken is well cooked and the water is almost gone. If the chicken is tender and juicy and has the flavor of all the spices, you know you have a winner! Easy as that!


The chicken, to all effect, is now done and you just have to garnish it. You may want to put your reading on hold for a few minutes here. Heat the oil in a wok. Drop in the onions and the ginger –garlic paste. Keep stirring and sautéing so that your onions get to a really dark-brown color because that’s when they taste really great. After this, add the green pepper and some salt and stir it till it is sautéed well.


Our chicken, forgotten for a while, can now take its place in a serving dish. Finally, just pour the sautéed onions and green peppers on the chicken. Garnish with coriander leaves. Voila! You can name it whatever you like. I’ll just call it the easiest and yummiest way to make chicken!


Prawns make a great alternative for chicken in this dish. Vegetarians, you can just make it with the potatoes or (you may not believe this!) brinjals. It tastes just as good!

Skinny Kids Can Be Healthy Too

My husband and I were waiting at the bus stop, and an old lady who we've never met before came up to us and said, "Don't you ...